In trying to set up things for my own home lab, I figured I would blog this for others to help get their lab environment set up as well.
WHY should you set up log forwarding to SplunkCloud?
Splunk offers a SplunkCloud trial instance that you can utilize for getting familiar with Splunk, and this also allows you to forward events to then troubleshoot or visualize your related application or log data in form of Splunk Dashboards. In this case, we’re setting this all up for CyberArk Vault syslog data.
Please try these items in your lab before deploying to production. I’m configuring this with just UDP and non-TLS for syslog for my lab. You should secure this better if using in an actual corporate environment. I’m not responsible for your own actions. If in doubt, contact CyberArk or Splunk Support!
Prerequisites —
- CyberArk Vault
- PVWA — Windows Server (note the IP address). I just did this for my lab…you should use a standalone server just for log forwarding.
- SplunkCloud Trial (https://www.splunk.com/en_us/download/splunk-cloud/cloud-trial.html)
- Cyberark splunk add-on app (includes splunk.xsl file)
- Splunk universal forwarder for Windows server.
CyberArk Vault pieces:
- Log into your CyberArk Vault server as the local admin account
- Navigate to your <drive>:\Program files (x86)\PrivateArk\Server\conf\ path and make a copy of your dbparm.ini file as a backup.
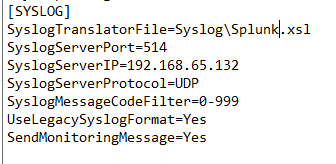
- Update your dbparm.ini file to include this info (update server IP as needed):
[SYSLOG]
SyslogTranslatorFile=Syslog\Splunk.xsl
SyslogServerPort=514
SyslogServerIP=192.168.65.132
SyslogServerProtocol=UDP
SyslogMessageCodeFilter=0–999
UseLegacySyslogFormat=Yes
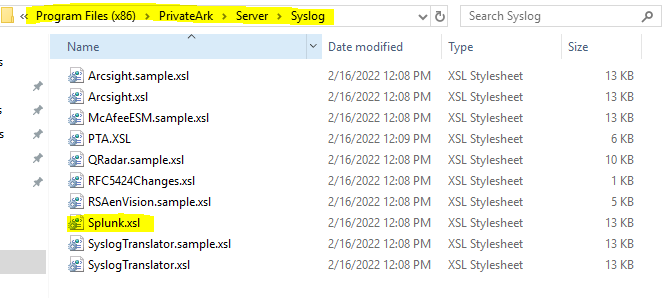
SendMonitoringMessage=Yes - Navigate to your <drive>:\Program files (x86)\PrivateArk\Server\syslog\ path. Place the Splunk.xsl file there. If you don’t have it, you can utilize the arcsight.xsl sample file.
- Open the “PrivateArk Server” application to stop and start the vault server service.
Splunk Universal Forwarder pieces:
- Log into your Windows Server
- Open “Windows Defender Firewall with Advanced Security”
- Create a new inbound firewall rule
- Select Port, click next
- Select UDP and select specific ports: 514, click next
- Select “Allow the connection”, click next
- Click next
- Name the rule “Allow Syslog port 514 UDP”, click finish
- Install the Splunk universal forwarder (UF), choose the SplunkCloud option at the beginning. Enter a username and password to set for the Splunk UF. Finish the install with defaults.
- Open CMD — run as admin.
- Install the splunkclouduf.spl app by entering the following command: <drive>:\Program Files\SplunkUniversalFowarder\bin\splunk.exe install app <drive>:\Users\<userprofilename>\Downloads\splunkclouduf.spl
- Type the username and password you set for the Splunk UF.
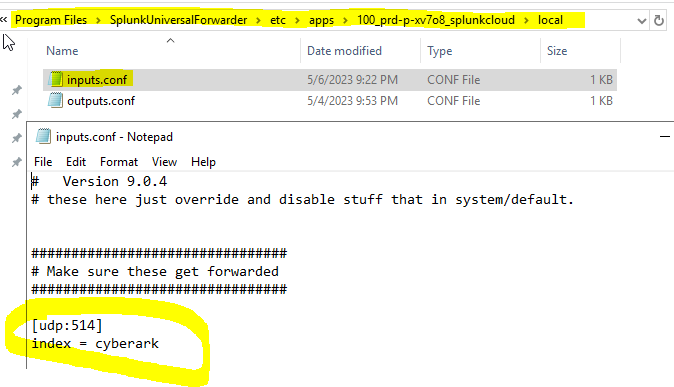
- Navigate to <drive>:\Program Files\SplunkUniversalFowarder\etc\apps\<splunkcloudnamehere>\local\
- Create a text file in this folder called inputs.conf
- Update the file to include these lines, then save:
[udp:514]
Index=cyberark - Open Services.msc and restart the “SplunkForwarder Service” for things to take effect.
SplunkCloud pieces:
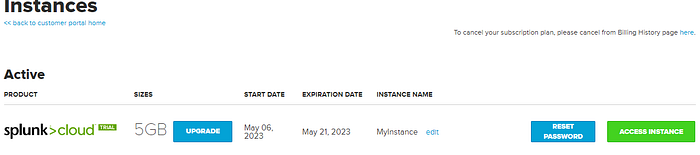
- Log into your SplunkCloud instance.
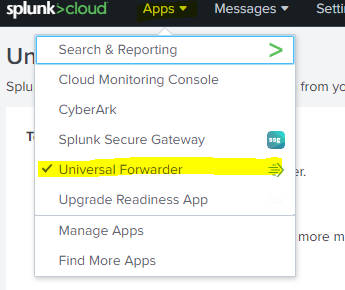
- Click Apps, find more apps.
- Search for CyberArk Splunk add-on.
- Install the app in SplunkCloud.
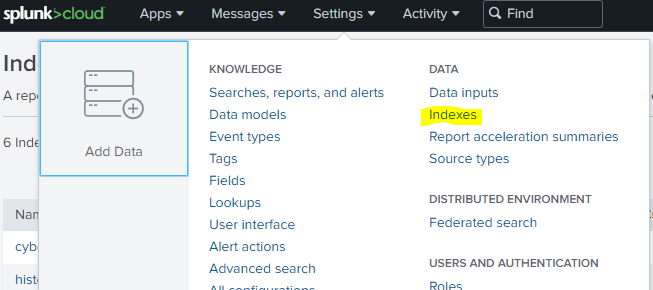
- Click on settings>indexes
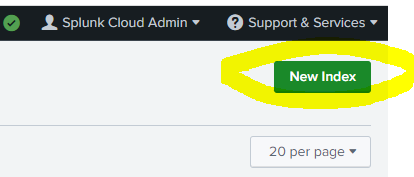
- Click new index
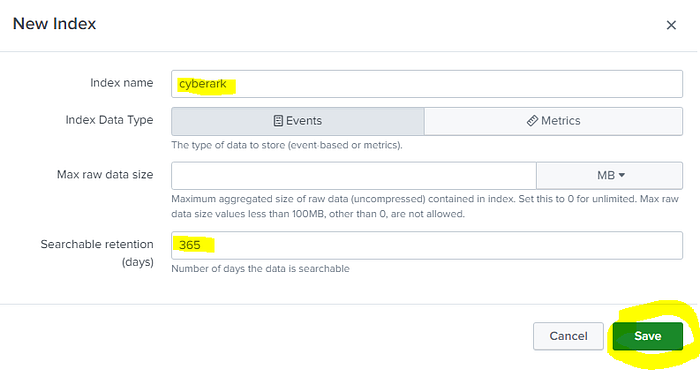
- Create a new index called cyberark. Set the max retention days to 365. Save.
- Wait ~5 minutes
- Click apps>search & reporting. Click search.
- Type out your starter search: index=cyberark …choose the last 7 days for your time picker.
PVWA pieces:
- Log into PVWA
- Perform various actions (CPM, PSM, add account, etc.) to trigger the events you want to see forwarded to SplunkCloud into the cyberark index.
- Wait ~1–5 minutes for events to populate within SplunkCloud.
- Search SplunkCloud again for cyberark events.
Visuals for your reference
Looking for a partner in your Privileged Access Management rollout?
Check out my site here — https://www.keyvaultsolutions.com/pages/contact-us
Additional thoughts —
- If needed, check out the official CyberArk documentation.
- If needed, check out the official Splunk documentation.
- If needed, contact CyberArk or Splunk support.
- Don’t deploy insecure settings to your corporate environment.
- To keep your searches and dashboards separate from other Splunk items and allow you to control who has access to the items…consider creating a new CyberArk Splunk app for use. Use the sample app template.
Related Links —
- https://www.splunk.com/en_us/download/splunk-cloud/cloud-trial.html
- https://docs.splunk.com/Documentation/Forwarder/9.0.4/Forwarder/ConfigSCUFCredentials
- https://docs.splunk.com/Documentation/Forwarder/9.0.4/Forwarder/HowtoforwarddatatoSplunkCloud?ref=hk#HowtoforwarddatatoSplunkCloud#How_to_forward_data_to_Splunk_Cloud
- https://docs.splunk.com/Documentation/SplunkCloud/9.0.2303/Admin/Configureinputs