Let’s talk about Remote Desktop Managers. Devolutions (DVLS) Remote Desktop Manager (RDM) has been a leader in Remote Desktop Management solutions for a long time. If you need to connect to whatever type of system, DVLS RDM likely supports it. Check out the DLVS RDM Tech Sheet and take a look at all of the RDM features. In this blog, we’ll take a look at using Devolutions’ Remote Desktop Manager for my home lab.
Note: My company, KeyVault Solutions, is a proud member of the Devolutions Reseller program. At the time of the writing of this blog, I’m a paid contractor for Devolutions.
Prerequisites —
- Access to your target server(s) via RDP, SSH.
- Devolutions RDM — https://devolutions.net/remote-desktop-manager
- Windows and RHEL server to connect to
Let’s take a look around —
In using Devolutions Remote Desktop Manager, there are a lot of options and customizations however you don’t need to worry about that out of the gate. We’ll take a look around the RDM interface to get more familiar.
- Open Devolutions RDM
- See below for the RDM UI areas.
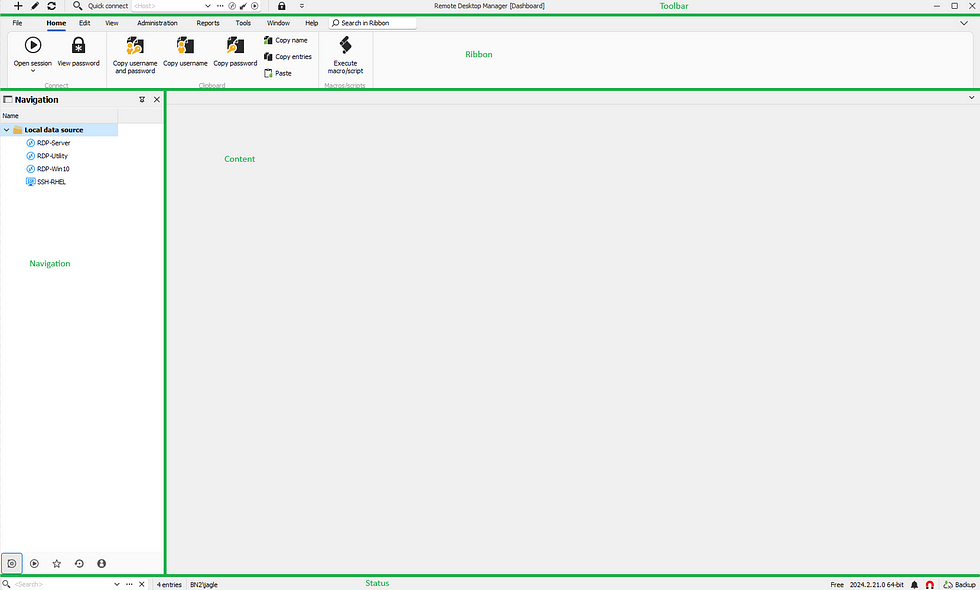
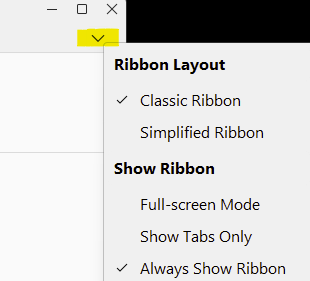
- You can adjust the Ribbon layout from the top right drop-down arrow. Choose which one that works best for you.
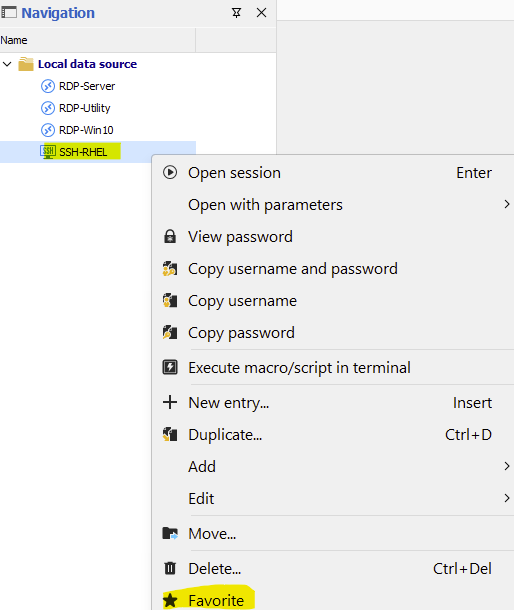
- If you end up with lots of RDM entries and need to quickly find one? Set your favorites. Right click on the entry and click Favorite.
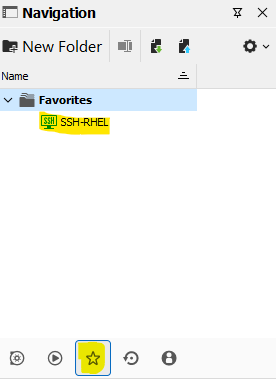
- Then in the Navigation Area, click on the Star on the bottom middle to see your favorites.
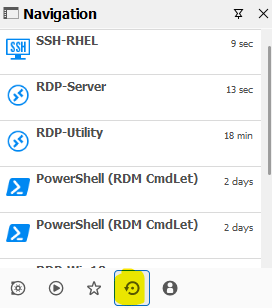
- Want to see your recent RDM connections? Click on Recent at the bottom of the Navigation area.
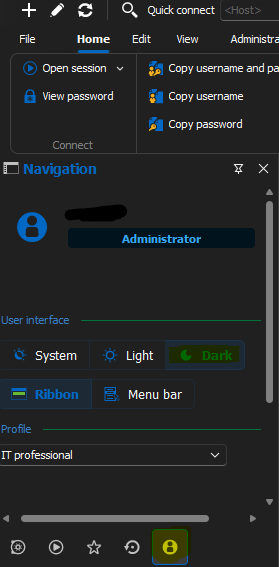
- In need of Dark mode? See below.
- We’ll take a look at creating new RDM entries next.
RDP to a Windows Server —
There are a number of out of the box templates to choose from. Let’s set up an RDP connection to our server first.
- Open Devolutions RDM if not already running.
- On the left navigation pane, right click and click New entry…
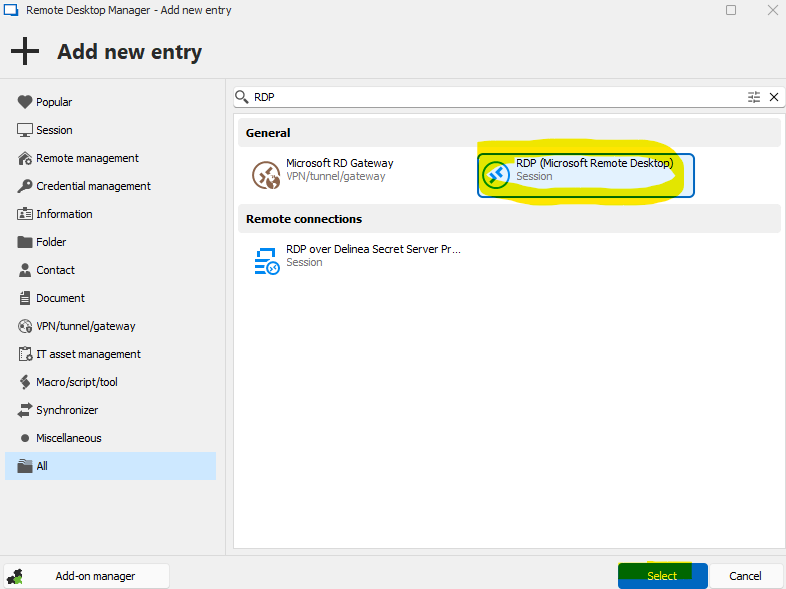
- Search for RDP, then click and select the RDP (Microsoft Remote Desktop) option.
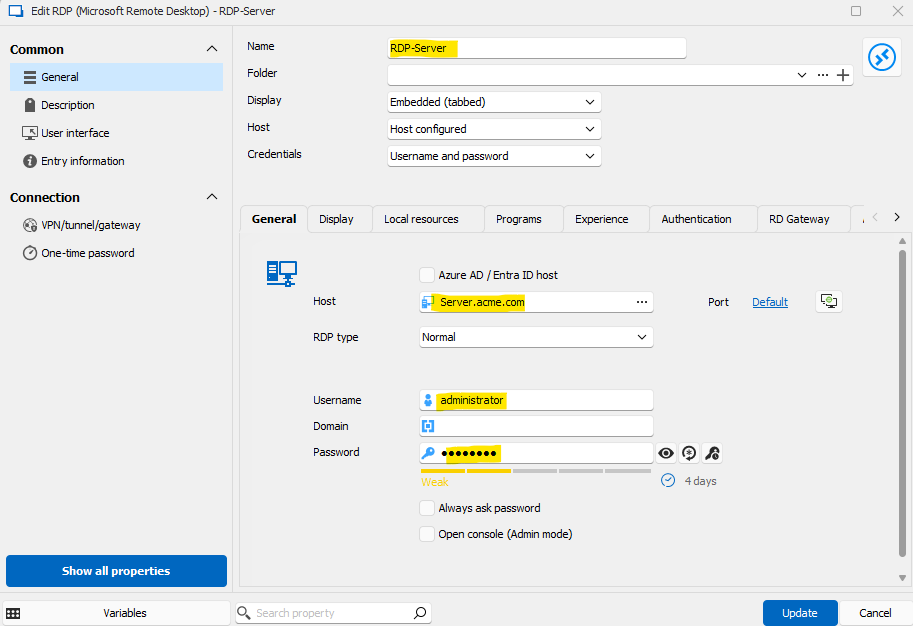
- Name the entry, RDP-Server.
- Populate the host we’ll be connecting to. For example, Server.acme.com
- Populate the Username and Password fields you’ll be using. For example, administrator is the username, and it’s password.
- Click Add.
- Your new RDP-Server entry is shown in the navigation pane.

- Double click the RDP-Server entry. You’re immediately logged into the server with the entry’s set credentials.
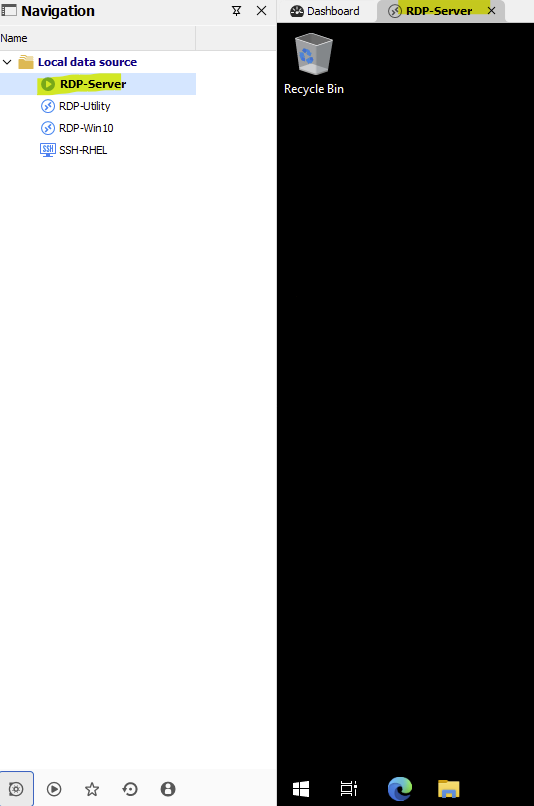
- You’re connected!
Create another RDP connector —
Let’s create another RDP connector, but this time for our Utility server.
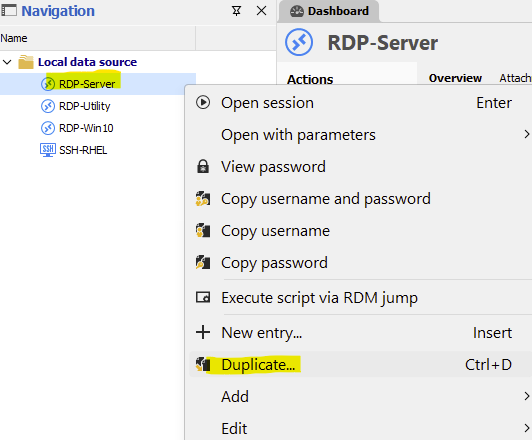
- Right click on the RDP-Server entry, click Duplicate.
- Adjust the name for this one to be RDP-Utility.
- Update the host name that we’ll be connecting to — Utility.acme.com.
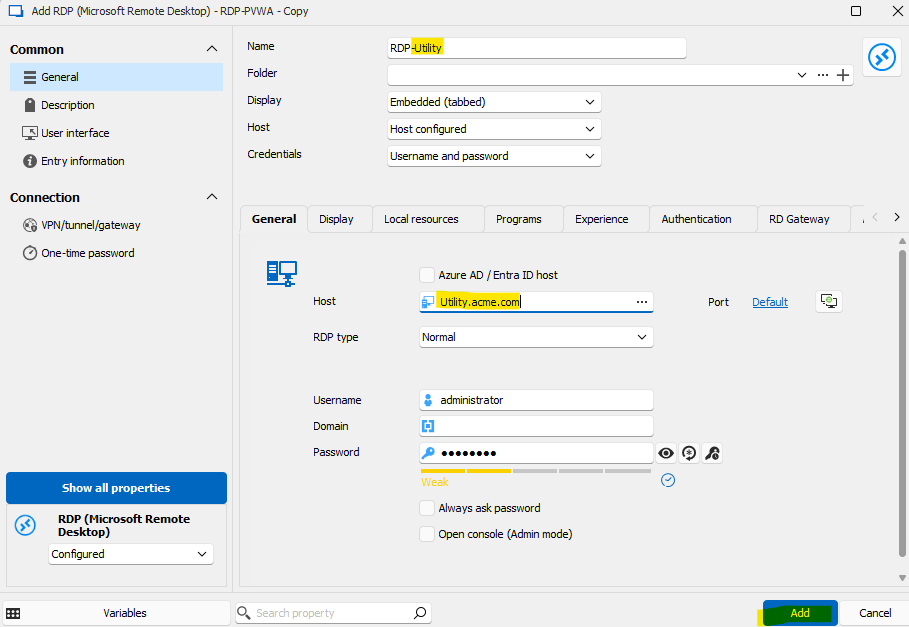
- Click Add.
- Double click on the RDP-Utility entry on the left navigation pane.
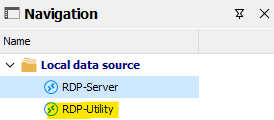
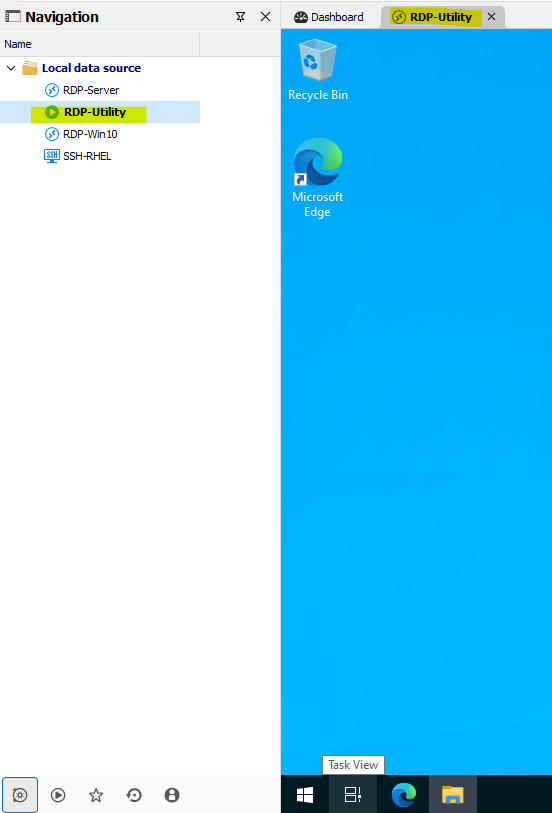
- You’re now connected to the Utility server.
SSH to a RHEL Server —
Let’s switch things up and connect to our RHEL server via SSH.
- Right click on the navigation pane and click Create New entry.
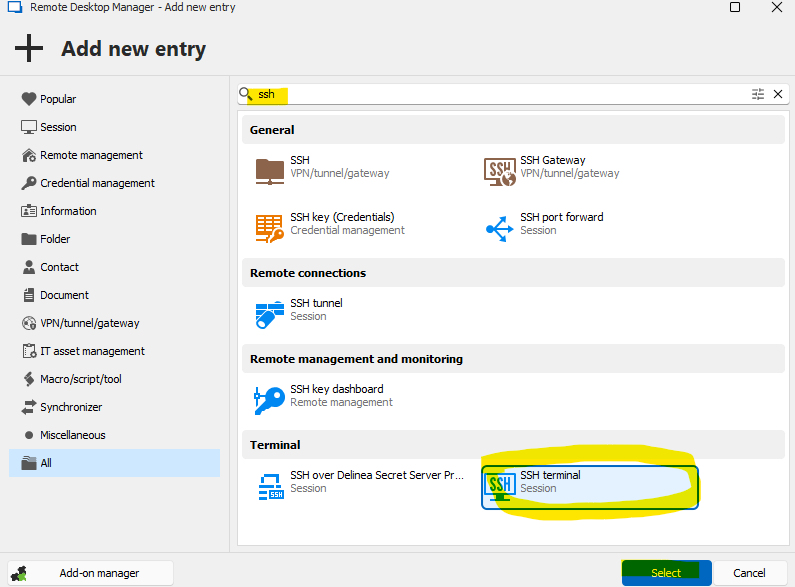
- Search for SSH, then select the SSH terminal template.
- Name the entry, then set the host, username, and password fields. In this example for my home lab, I’m using SSH-RHEL, RHEL as the Host, and keyvault as the username with the password set.
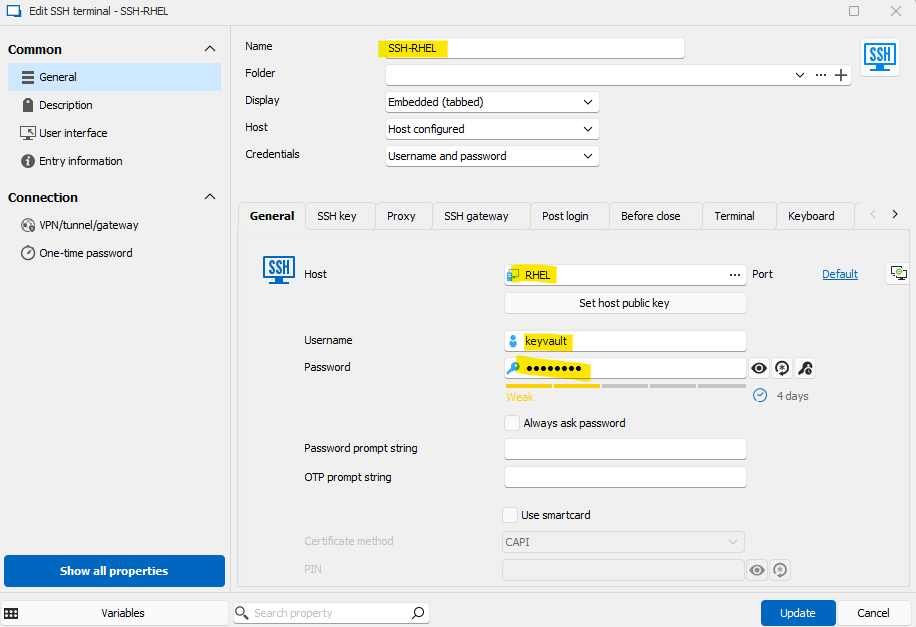
- Click Add.
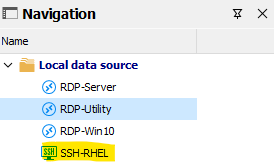
- Double click on the SSH-RHEL entry. If prompted as your 1st time connecting, click Register the fingerprint and connect.
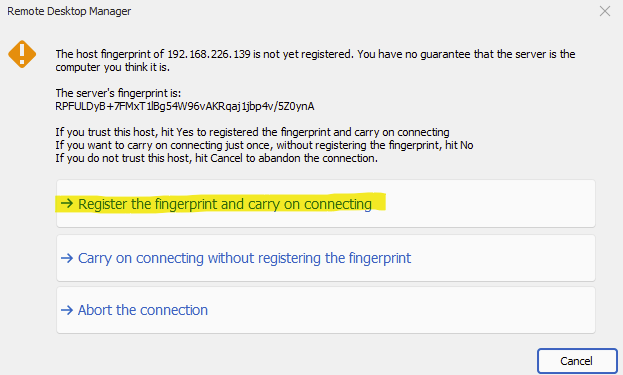

- You’re now connected via SSH to your RHEL host.
In need of a solid Remote Desktop Manager? Looking for a partner in your Privileged Access Management rollout?
Contact us here — https://www.keyvaultsolutions.com/pages/contact-us

Recommended items:
- Check out Devolutions Remote Desktop Manager for your company.
- Use CyberArk at your company? Ask the Devolutions sales team for a trial CyberArk integration module license.
- Try out other RDM templates.
