Lets continue with configuring the additional pieces related to CyberArk + ServiceNow ticket integrations.
Reminder — UPVOTE this enhancement request if you haven’t already! https://cyberark.my.site.com/s/article/ServiceNow-Integration-with-ALL-Ticket-Types-dQAI
A big part of this is gathering requirements from your “customer”, whether that’s internal or external. Find out what Change/INC states are allowed per their or your own audit and/or compliance teams, or even your internal Change Management team whom may administer what should be allowed or not. Include other stake holders in deploying this requirement.
There are multiple ticket states and types within ServiceNow which are utilized for different reasons. In this walkthrough, we’re only focused on the items which are currently supported by the CyberArk + ServiceNow out of the box ticket integration at this time; CHG, INC.
VOTE!! https://cyberark.my.site.com/s/article/ServiceNow-Integration-with-ALL-Ticket-Types-dQAI
Prerequisites —
- See the previous blog related to items you’ve already configured related to the super basic allowed items with CyberArk + ServiceNow ticket integrations. https://medium.com/@aglerj/cyberark-servicenow-ticket-integration-for-the-win-6c37bac13598
Configure ticket validations by state:
- Log onto PVWA as an administrator.
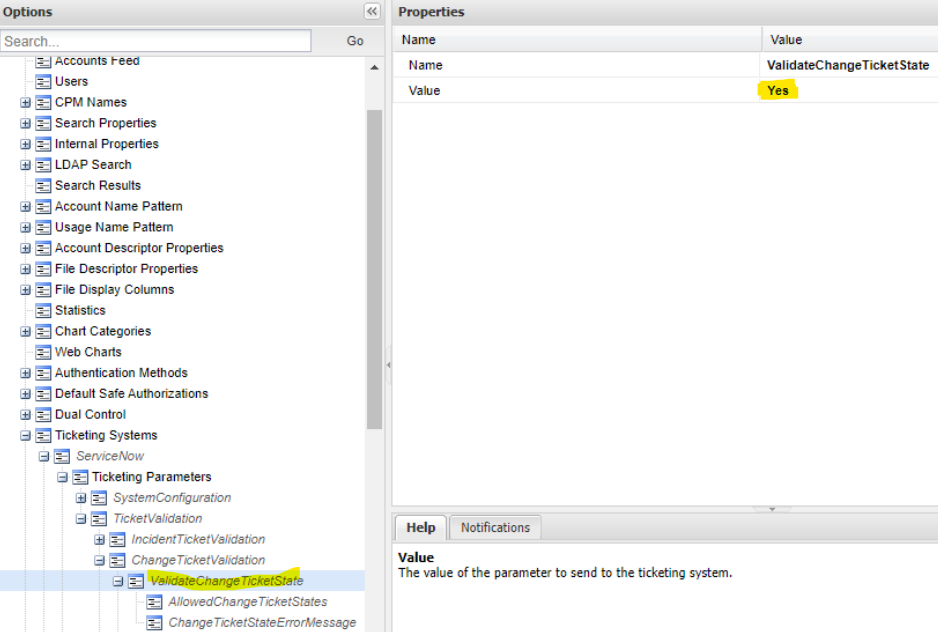
- Administration>Options>Ticketing Systems> ServiceNow > Ticketing Parameters > TicketValidation > ChangeTicketValidation, set ValidateChangeTicketState to Yes.
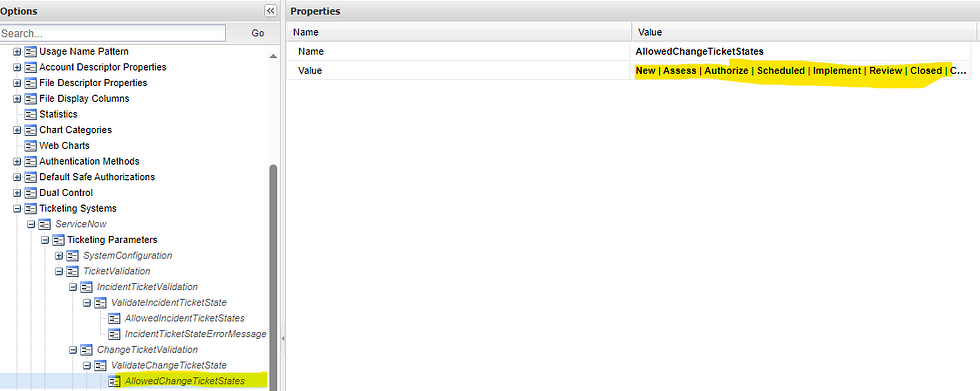
- Under ChangeTicketValidation, click on AllowedChangeTicketStates.
- See the below related to the settings you can adjust as needed per your requirements.
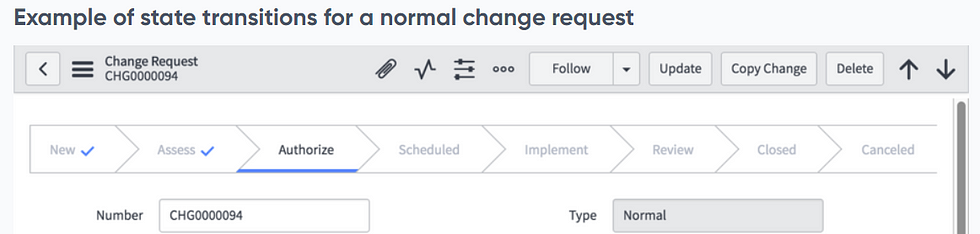
- For CHG artifacts, these are the state options: New | Assess | Authorize | Scheduled | Implement | Review | Closed | Canceled
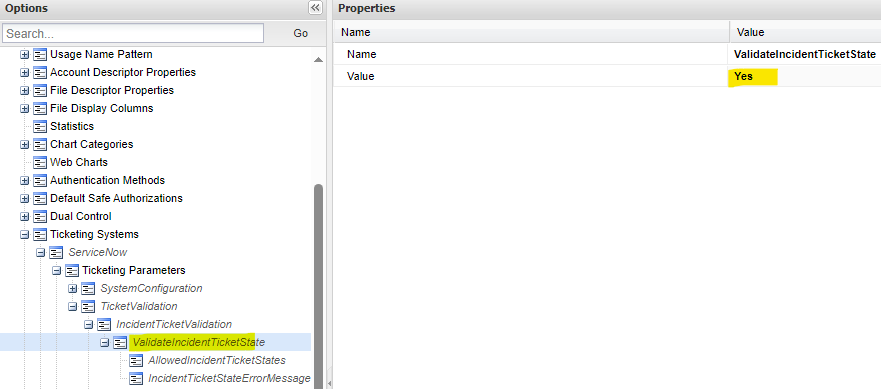
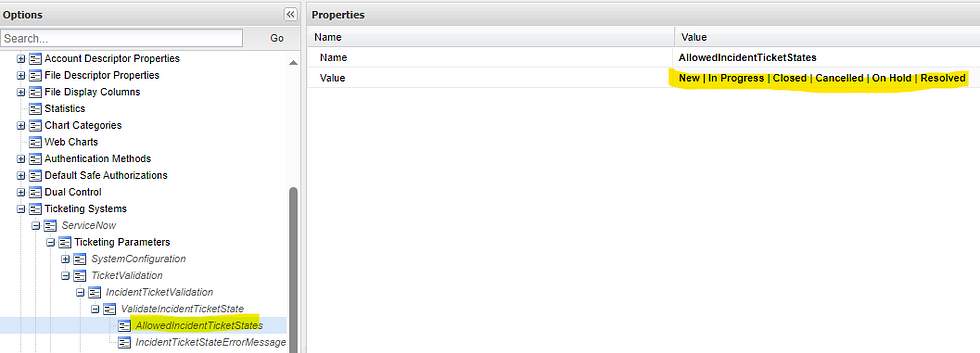
- Under ServiceNow > Ticketing Parameters > TicketValidation > IncidentTicketValidation, set ValidateIncidentTicketState to Yes.
- Under IncidentTicketValidation, click on AllowedIncidentTicketStates.
- See below related to the settings you can adjust as needed per your requirements. Leave the states you only want to be allowed for a user to pull a credential.
- For INC artifacts, these are the state options: New | In Progress | Closed | Canceled | On Hold | Resolved
- Click Apply to save your adjustments.
Configure Validate Change ticket approval status:
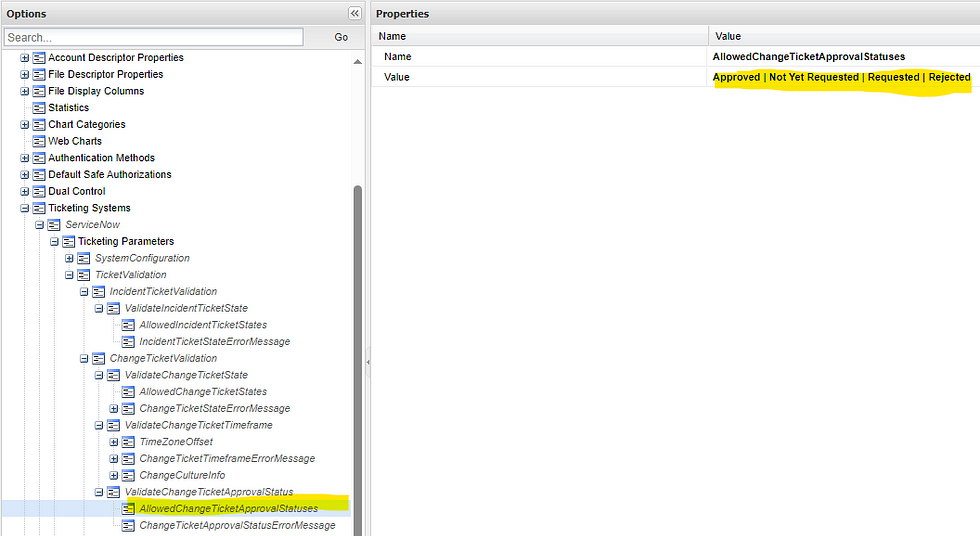
- Under ServiceNow > Ticketing Parameters > TicketValidation > ChangeTicketValidation, set ValidateChangeTicketApprovalStatus to Yes.

- See the image below related to the settings you can adjust as needed per your requirements.
- CHG Approval Status options: Approved | Not Yet Requested | Requested | Rejected
- Click Apply to save your adjustments.
Configure a Ticket bypass code:
- In case you didn’t create one previously…
- Under ServiceNow > Ticketing Parameters > SystemConfiguration, click on FailsafeBypassCode.
- Update the value to be whatever you prefer as a bypass word.
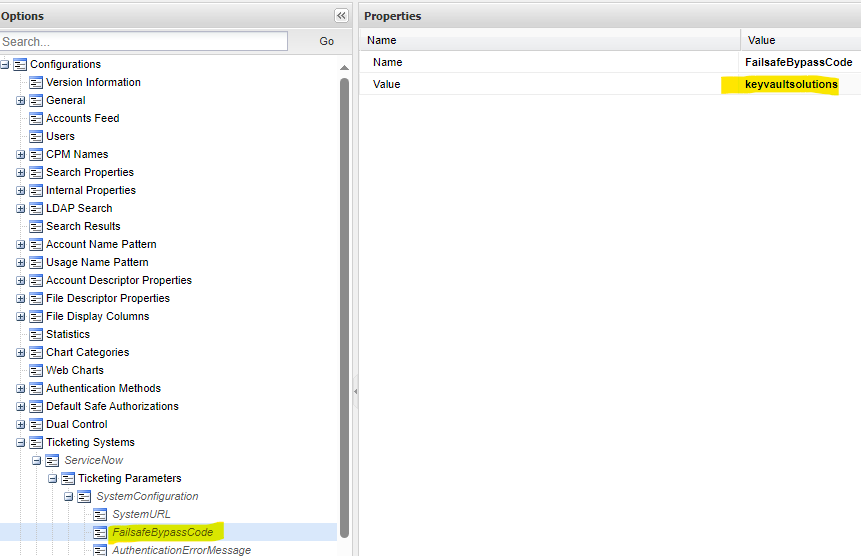
- Click Apply to save your adjustments.
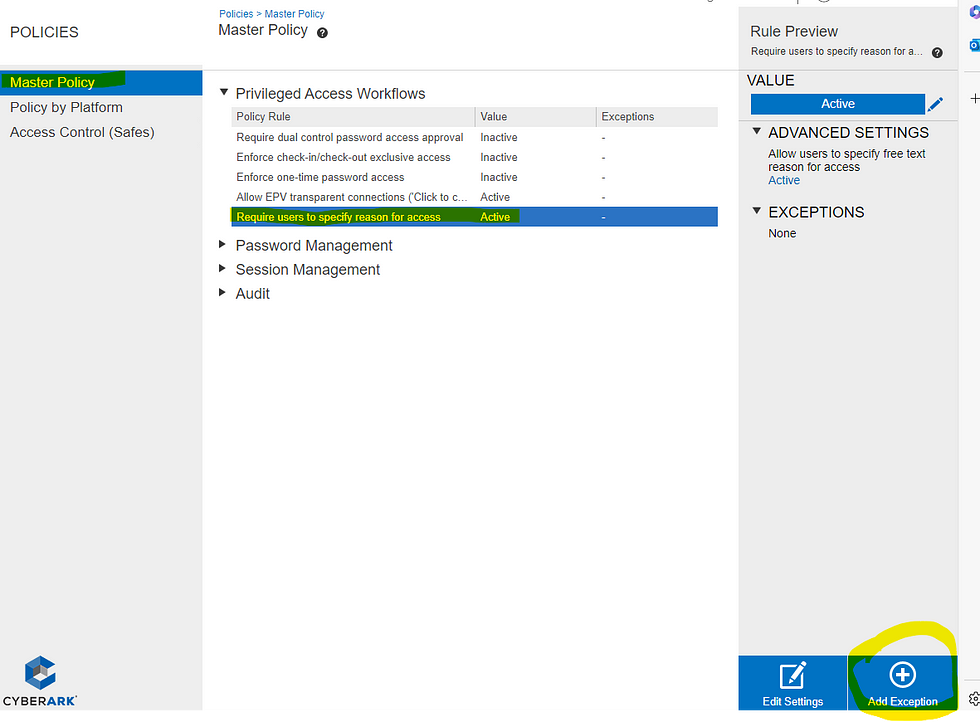
Option 1 — Remove Requiring users to specify a reason for access for Ticket Integrated platforms:
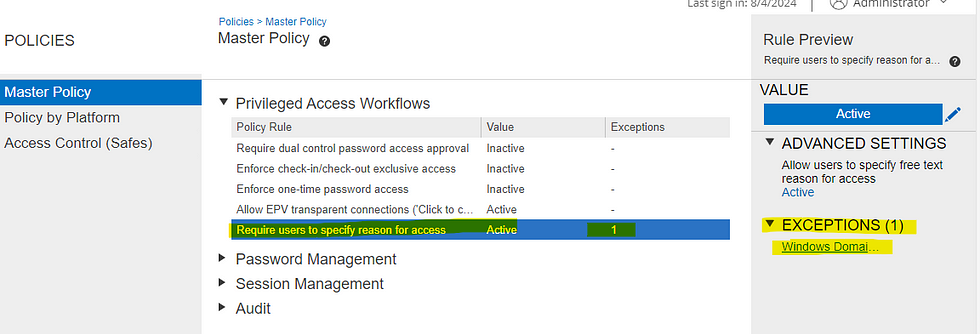
- Policies>Master Policy>click on Require users to specify reason for access (default is Active)
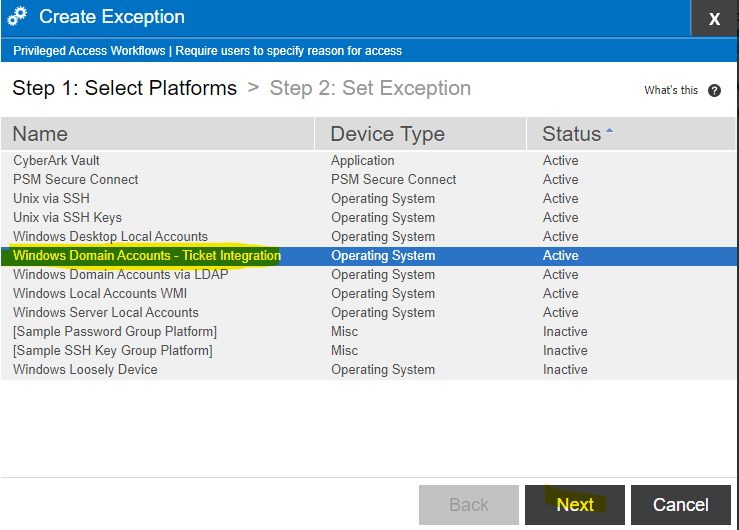
- Click Add Exception
- Select your ticket integration platform and click next.
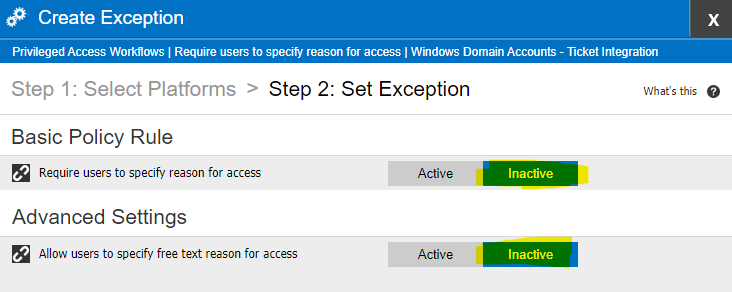
- Set Require users to specify reason for access to Inactive.
- Set Allow users to specify free text reason for access to Inactive.
- Click Finish.
Note that the new Modern UI vs old UI acts differently. In the modern UI it will still show the reason box, however users won’t be required to enter anything once set. In the Classic UI it won’t show the reason box at all since it’s optional.
Option 2 — Require users to specify a provided reason for access for Ticket Integrated platforms:
- Policies>Master Policy>click on Require users to specify reason for access (default is Active)
- Click Add Exception
- Select your ticket integration platform and click next.
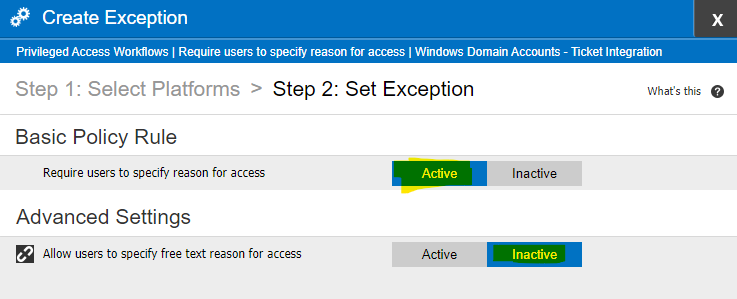
- Set Require users to specify reason for access to Active.
- Set Allow users to specify free text reason for access to Inactive.
- Click Finish.
Set specific reasons for use:
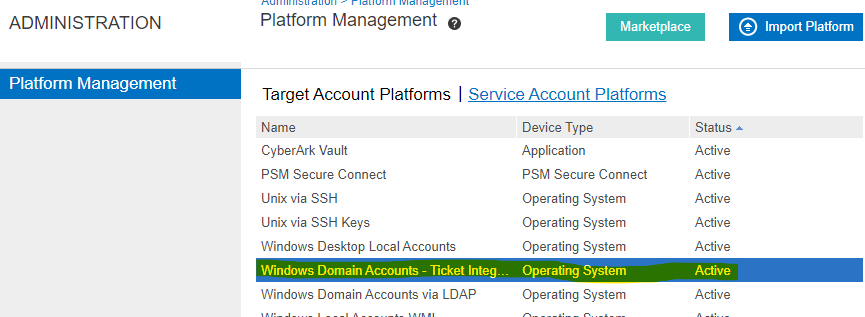
- Administration > Platform Management>click the related ticket integration platform. Click Edit.
- Right click on UI & Workflows. Add Privileged Account Request.
- Right click on Predefined Reasons and select add reason.
- Add whatever reasons you want to require from your users to choose from.
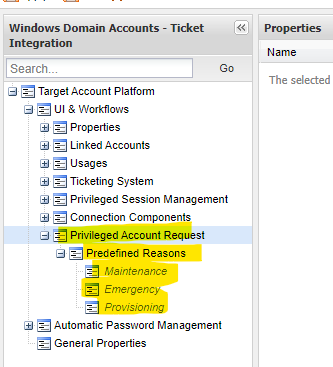
- Click Apply to save your adjustments.
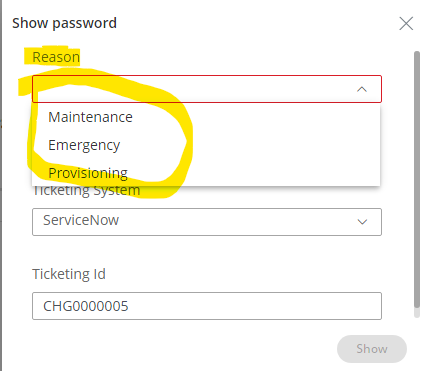
- See below for what it looks like related to the provided reasons you set above for the users.
Looking for a partner in your Privileged Access Management rollout?
Check out my site here — https://www.keyvaultsolutions.com/pages/contact-us
Recommended items:
- Limit sharing and/or use of any bypass codes. Ideally these would only be provided CyberArk PAM admins to users temporarily when ServiceNow systems are down.
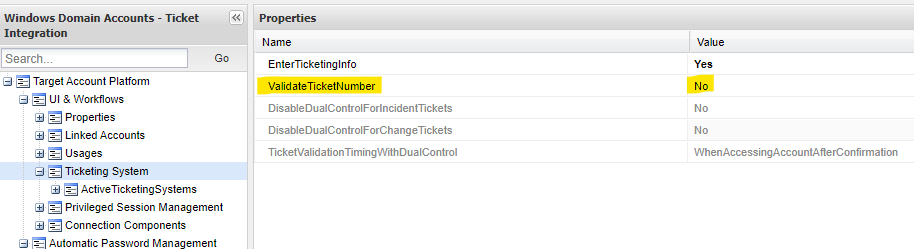
- Depending on the outage length, you can simply turn off ticket validations on the related platform(s) until ServiceNow is available again. See the image below. This would still require the user to provide the related ticketing information but not validate the ticket format, states, etc. Be sure to re-enable this once ServiceNow is back up.
- In need of multiple ticketing integrations set for use during a transition from one ticketing system to another?
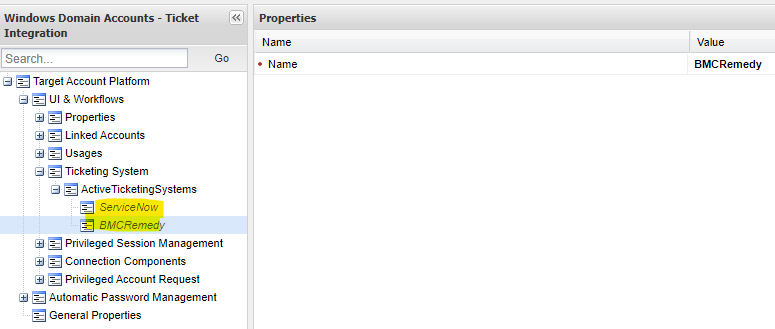
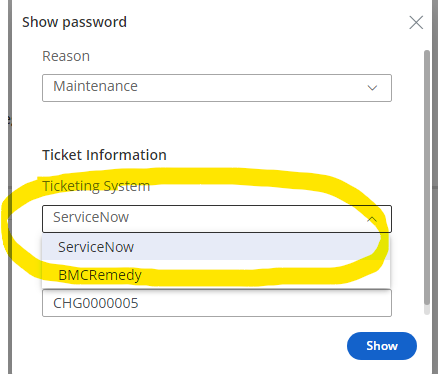
Administration > Platform Management>click the related ticket integration platform. Click Edit. Navigate to Ticketing System. Right click on ActiveTicketingSystems, and choose add TicketingSystem. Add the name of the second ticketing system you configured separately. For example, BMCRemedy. Click Apply to save settings. When migrations are finished, remove the original option and save.
Related CyberArk & ServiceNow Documentation —
- https://medium.com/@aglerj/cyberark-servicenow-ticket-integration-for-the-win-6c37bac13598
- https://docs.cyberark.com/pam-self-hosted/Latest/en/Content/PASIMP/TicketingIntegrationServiceNow.htm
- https://docs.cyberark.com/privilege-cloud-shared-services/latest/en/Content/Privilege%20Cloud/PrivCloud-Access-Reason-Privilege-Account.htm
- https://community.cyberark.com/s/article/PVWA-Configuring-pre-defined-Access-Reasons
- https://docs.servicenow.com/bundle/vancouver-it-service-management/page/product/change-management/concept/c_ITILChangeManagement.html
- https://www.servicenow.com/products/incident-management.html?state=seamless
- https://docs.servicenow.com/bundle/vancouver-it-service-management/page/product/incident-management/concept/c_IncidentManagementStateModel.html
- https://docs.servicenow.com/bundle/vancouver-it-service-management/page/product/change-management/concept/c_ChangeStateModel.html
- https://docs.cyberark.com/pam-self-hosted/Latest/en/Content/PASIMP/Configuring-Dual-Control-together-with-Ticketing-Integration.htm?tocpath=Administrator%7CComponents%7CPVWA%7CConfigure%20the%20PVWA%7C_____8